 When VMware introduced vSphere 5 to the world, one of the enhancements was a new API for storage arrays that provides vSphere with information as to the configuration and performance of your storage array. For more information on VASA, please see this article from The Virtualization Practice. VASA on a VNX (and other EMC arrays) historically used to be configured using an SMI-S provider. This older configuration method has been covered very well by EMC vSpecialist Craig Stewart and can be found here.
Starting with VNX OE for FILE 7.1 and VNX OE for BLOCK 05.32, the VNX now has native VASA support. This eliminates the need for the SMI-S provider and allows you to point vSphere directly to the control station and SP. It really is a 1-step implementation and I will show you below. And there is only 1 caviot to this, and it is VASA for the BLOCK and FILE are done separately. if you are using, FC, FCoE, or iSCSI connections, you will want to use the BLOCK example, and if you are using NFS, you will want to use the FILE example.
You will want to start in vSphere by going to Home > Administration > Storage Providers. From there you would click on “add…” to configure your connection.
VNX OE for FILE 7.1 VASA configuration example
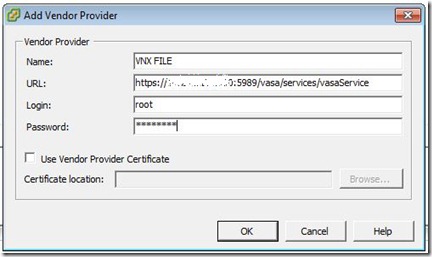
You will start by naming this connection. I chose VNX FILE to make it easy to distinguish between block and file connections. You will then use the URL as follows: https://<ip.or.dns.of.control.station>:5989/vasa/services/vasaService. The username/password would be one local to the control station (such as nasadmin or root). The global accounts from the storage domain will not work here. When it’s all said and done you should have something like the photo below:
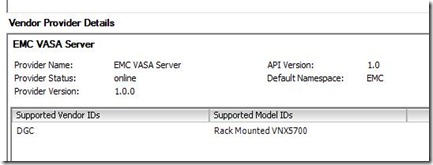
You will probably be prompted to verify the SHA fingerprint, so just click yes and soon you’ll see your new provider listed with the following information:
VNX OE for BLOCK 05.32 configuration example
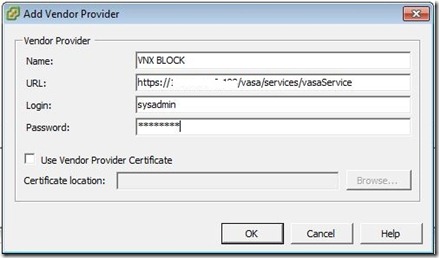
Just like the VNX OE for FILE example, you will start off by using a name. This time the URL will be pointing to the SP. The url will be as follows: https://<ip.or.dns.of.SP>/vasa/services/vasaService. Please note the lack of a port specification as by default https uses port 443. For the password you will want to use a storage domain account (such as sysadmin). If you configured it correctly, it should look something like this:
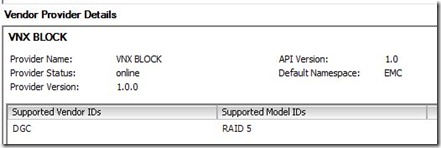
Since I have a very basic configured array in the lab, I see provider information like this:
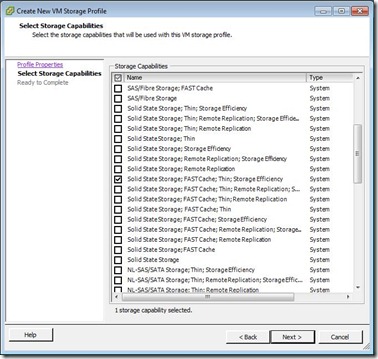
After you have successfully configured your providers, you can go and setup your storage profiles. Go to Home > Management > VM Storage Profiles and add a new profile. From there you can select from a multitude of options to pick the one that best matches the lun you are using for storage.
It really is that simple! For more information on VASA on the VNX, read the Virtualization for EMC® VNX Release Notes (EMC Support credentials required).





 Twitter
 LinkedIn
 RSS
RSS Youtube
 Picasa
 Email
Email
